ESP8266
The ESP8266 is a low-cost Wi-Fi microchip with full TCP/IP stack and microcontroller capability produced by Espressif Systems. One of the coolest things about this cip is it can run Micropython. If you are new to programming or hardware/embedded systems and want to get into those, ESP8266 is a good way to get started.
Micropython
MicroPython is a lean and efficient implementation of the Python 3 programming
language that includes a small subset of the Python standard library and is
optimised to run on microcontrollers and in constrained environments.
- Source https://micropython.org/
As Micropython follows Python 3 coding standard. It is very easy for people who know python to get into hardware stuff.
Let’s get started
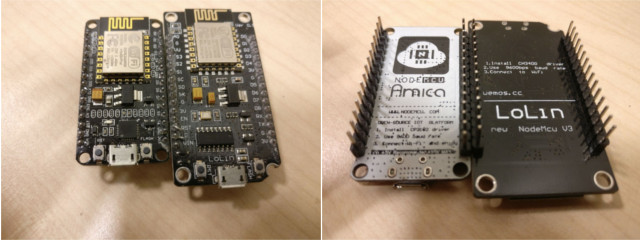
I’m using NodeMCU for now. If your are not from electronics/embedded systems background, it is better to go with development boards like NodeMCU than using chips and breadboards and if you are from electronics background; these development boards are very useful for prototyping.

Download the firmware.
You can find the stable and nightly builds for micropython for ESP8266 in MicroPython’s Download section
Deploy the firmware on ESP8266
To deploy the Firmware on ESP8266 there is a python tool called
esptool.
You can install it using pip (this tool is written in python, so if you are
on linux or on mac os you will already have python installed with either pip
or easy_install. If you are on windows, you need to install python first to
use this tool.)
or you can install the latest version from it’s github repo
To install esptool using pip
$ pip install esptoolTo install esptool from github repo
$ git clone https://github.com/espressif/esptool/
$ cd esptool
$ python setup.py build
$ python setup.py install
Once this tool is installed you first need to erase the flash of ESP8266 modeule using following command.
$ esptool.py --port /dev/ttyUSB0 erase_flashTo deploy the firmware you have just downloaded
$ esptool.py --port /dev/ttyUSB0 --baud 460800 write_flash --flash_size=detect 0 esp8266-20180511-v1.9.4.binFor some boards with a particular FlashROM configuration (e.g. some variants of a NodeMCU board) you may need to use the following command to deploy the firmware (note the -fm dio option):
$ esptool.py --port /dev/ttyUSB0 --baud 460800 write_flash --flash_size=detect -fm dio 0 esp8266-20180511-v1.9.4.bin After you successfully deployed the firmware the controller will reset itself and then you are ready to use the REPL.
For those who don't know about REPL, it stands for Read–Eval–Print Loop it
is the "language shell". If you have used the python intepreter before; that
is REPL.
Using REPL
You can access the MicroPython REPL on ESP8266 in two different ways.
- Over
Serial or tty Port - Web REPL
REPL Over Serial Port
To access the prompt over USB-serial you need to use a terminal emulator program. There are various good tools available for this purpose.
Windows
- TeraTerm
- Putty
Linux
- Minicom
- PicoCom
- Screen
- GtkTerm
MacOs
- Screen
There are plenty of other tools avalable for each of these platforms you can choose whichever you like.
The default baudrate for the module is 115200.
WebREPL
WebREPL allows you to use the Python prompt over WiFi, connecting through a browser. The latest versions of Firefox and Chrome are supported.
Connect the module using USB Serial and set password for WebREPL
import webrepl_setupGo to WebREPL client from browser.
Then Connect to the NodeMCU’s accesspoint.
The ESSID is of the form
MicroPython-xxxxxxwhere thex’s are replaced with part of the MAC address of your device (so will be the same everytime, and most likely different for all ESP8266 chips). The password for the WiFi ismicropythoNEnter IP:
ws://192.168.4.1:8266/and click connect.
Enter the password you just set in the terminal screen on your browser.
Once this is done you will see the “
>>>” prompt, now you can use your ESP8266 module from your web browser itself.
In the next post I’ll be writing about networking with ESP8266 (connecting 8266 module to a wifi network and making http requests from and to ESP8266).